> ## Documentation Index
> Fetch the complete documentation index at: https://docs.portalhq.io/llms.txt
> Use this file to discover all available pages before exploring further.
# Email magic links
> Verify a sending domain, build a magic link email template, and sign users in from a link sent to their inbox.
A magic link signs a user in from an email. Your app asks Portal to email a link,
the user clicks it, and they land back on your site with a single-use token your
app exchanges for a Client Session Token.
Magic links are sent from **your** domain, not from Portal, so two things have to
be in place first:
1. A **sending domain**, verified with DNS records and enabled for the
environment.
2. An **email template**, containing the sign-in link.
Both are configured once per custodian and can then be used by any of your
environments.
## Step 1: Add a sending domain
Step 1: Click **Domains** in the left sidebar, under Authentication.
Step 2: Click to add a domain and fill in:
* **Domain**: the domain the emails are sent from, for example
`auth.example.com`.
* **From email**: the address the emails come from. It must be an address on the
domain above, for example `hello@auth.example.com`.
* **Environments**: which environments are allowed to send from this domain.
 The from email has to be lowercase and on the domain you entered. A from email
such as `Hello@auth.example.com` or `hello@other.example.com` is rejected.
## Step 2: Add the DNS records
Saving the domain takes you to its detail page, which lists the DNS records to
add at your DNS provider. These are the SPF and DKIM records that let mailbox
providers confirm the email genuinely came from your domain.
The from email has to be lowercase and on the domain you entered. A from email
such as `Hello@auth.example.com` or `hello@other.example.com` is rejected.
## Step 2: Add the DNS records
Saving the domain takes you to its detail page, which lists the DNS records to
add at your DNS provider. These are the SPF and DKIM records that let mailbox
providers confirm the email genuinely came from your domain.
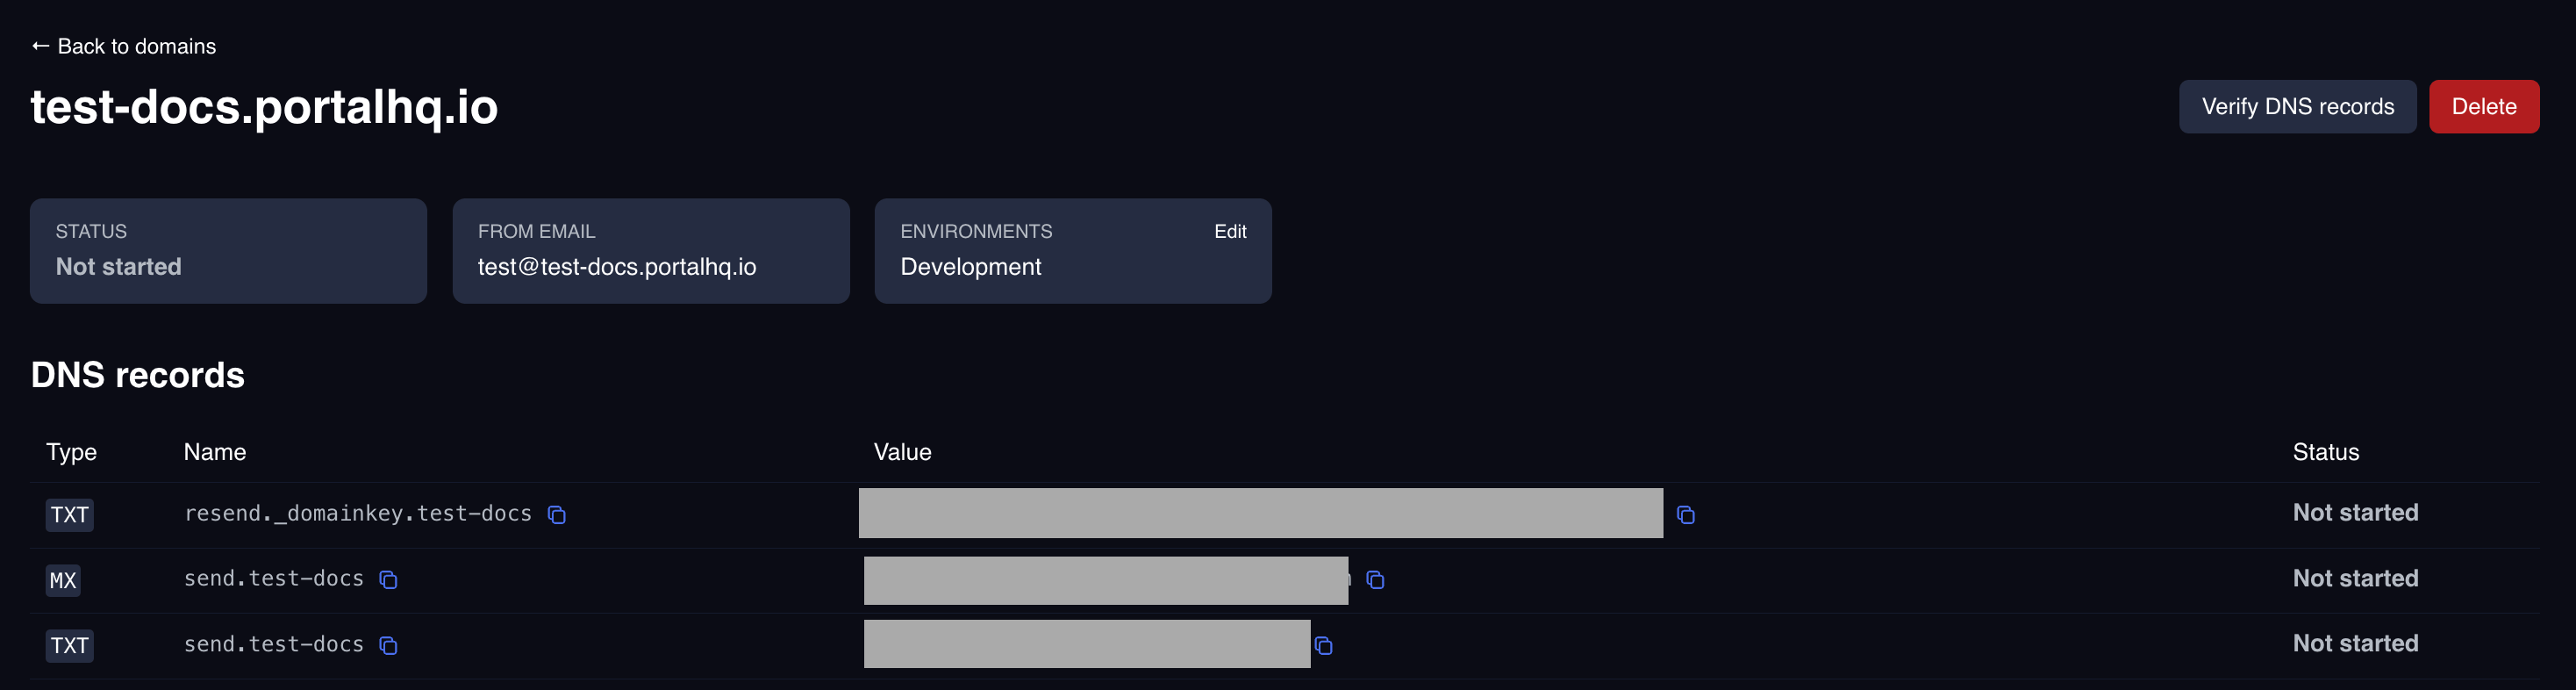 Add every record exactly as shown, then come back and click **Verify DNS
records**.
Add every record exactly as shown, then come back and click **Verify DNS
records**.
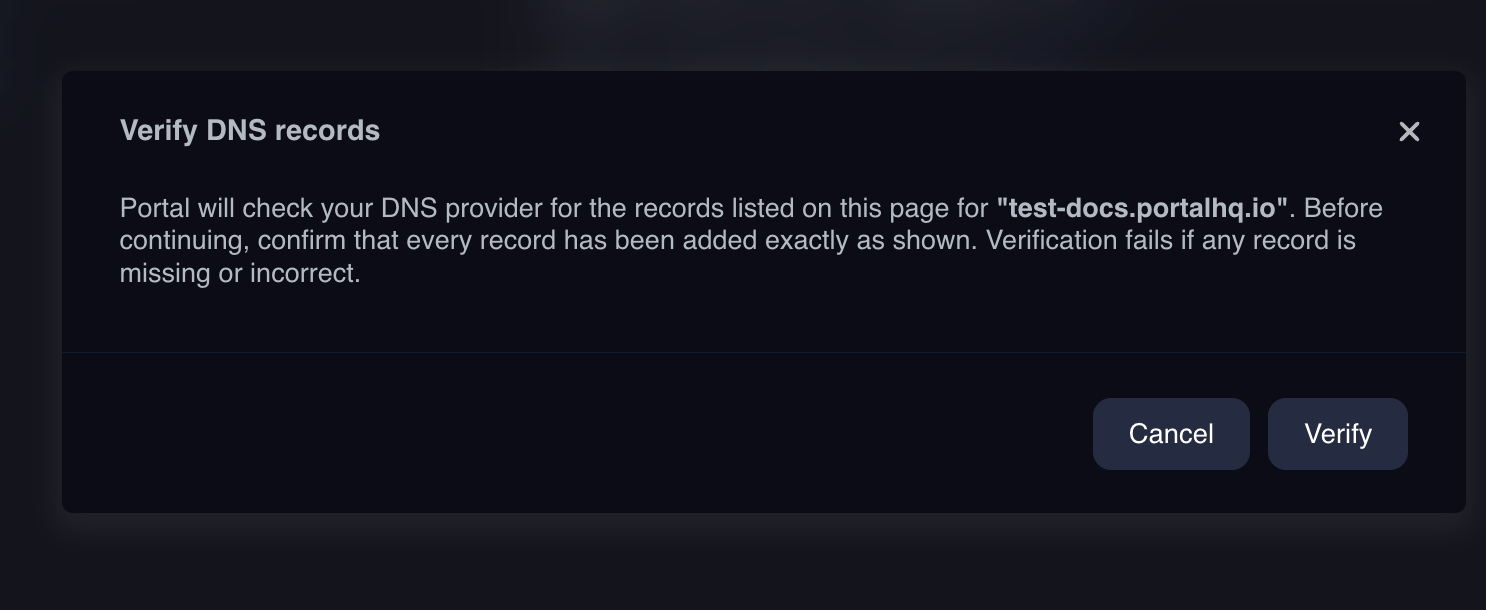 Verification checks all of the records at once and fails if any one of them is
missing or does not match. DNS changes can take a while to propagate, so if
verification fails immediately after you add the records, wait and check the
domain again.
### Domain statuses
| Status | Meaning |
| -------------------- | -------------------------------------------------------------------- |
| `not_started` | The records have not been checked yet. |
| `pending` | Verification is in progress. |
| `verified` | All records are correct. The domain can send. |
| `partially_verified` | Some records are correct and others are not yet. |
| `failed` | Verification failed. Re-check the records against your DNS provider. |
| `partially_failed` | Some records failed. |
A domain has to reach `verified` before magic links will send from it.
## Step 3: Create an email template
Step 1: Click **Templates** in the left sidebar, under Authentication.
Step 2: Create a template and give it a **name** and a **subject**.
Verification checks all of the records at once and fails if any one of them is
missing or does not match. DNS changes can take a while to propagate, so if
verification fails immediately after you add the records, wait and check the
domain again.
### Domain statuses
| Status | Meaning |
| -------------------- | -------------------------------------------------------------------- |
| `not_started` | The records have not been checked yet. |
| `pending` | Verification is in progress. |
| `verified` | All records are correct. The domain can send. |
| `partially_verified` | Some records are correct and others are not yet. |
| `failed` | Verification failed. Re-check the records against your DNS provider. |
| `partially_failed` | Some records failed. |
A domain has to reach `verified` before magic links will send from it.
## Step 3: Create an email template
Step 1: Click **Templates** in the left sidebar, under Authentication.
Step 2: Create a template and give it a **name** and a **subject**.
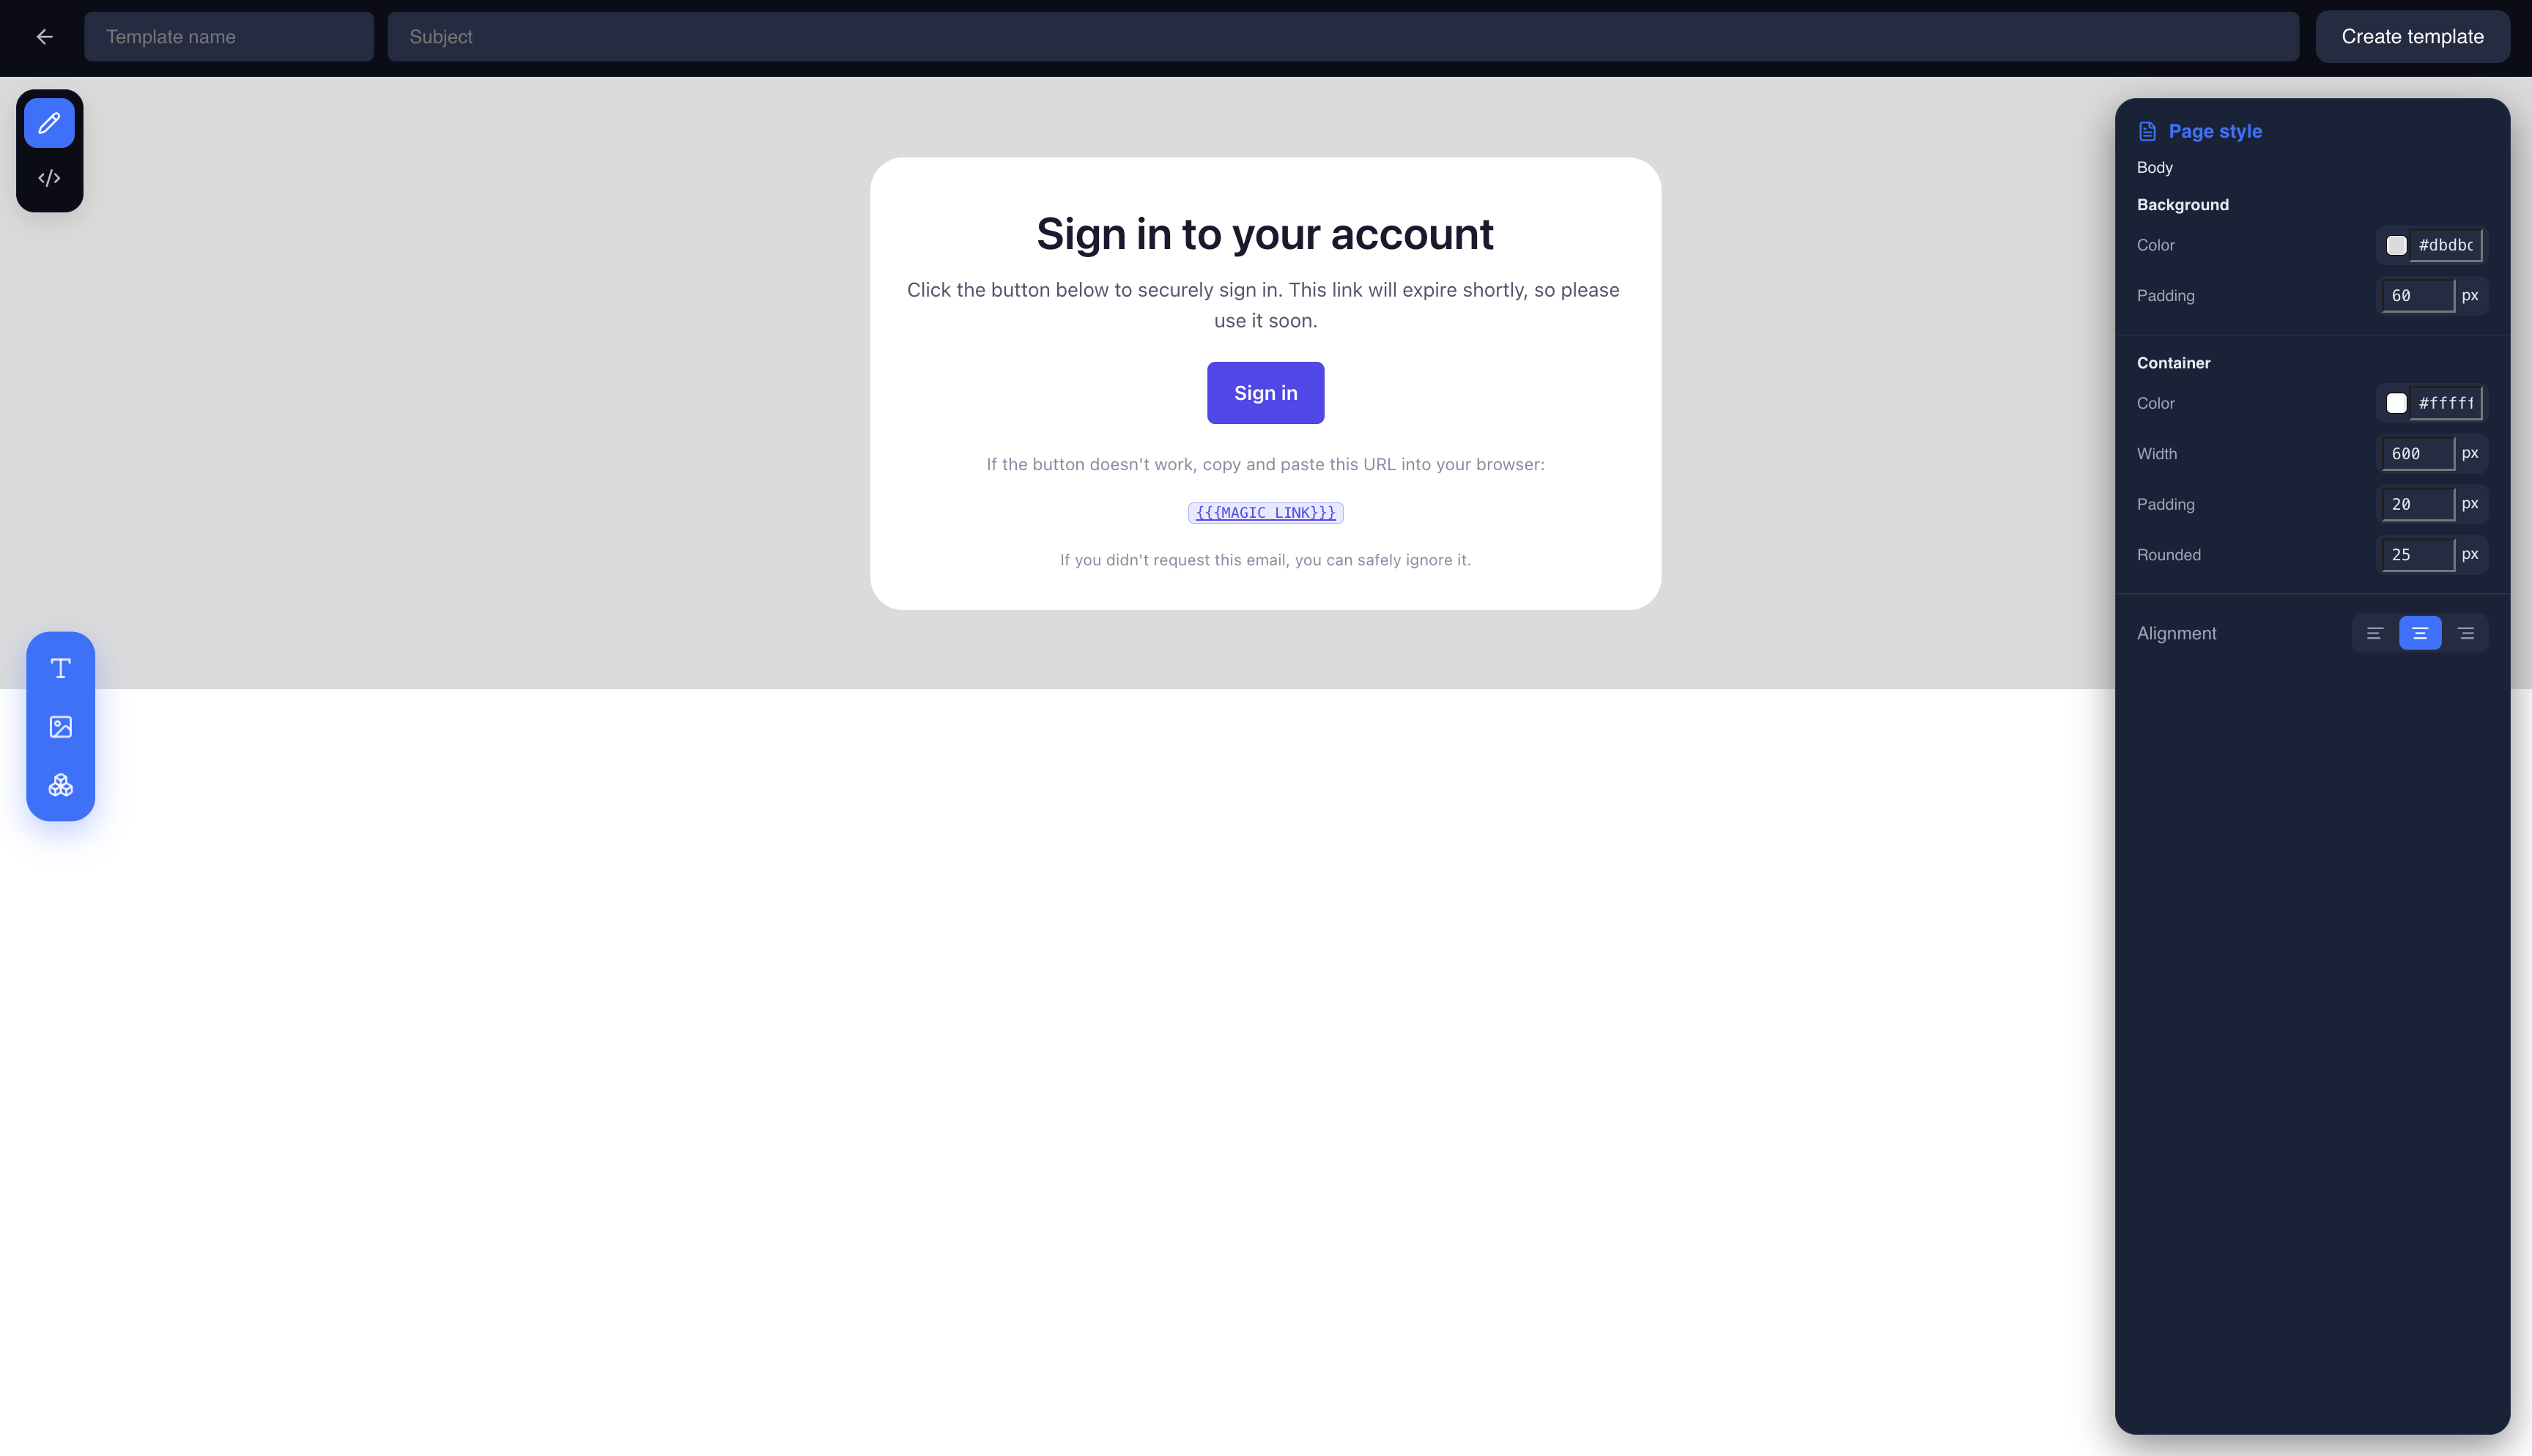
 Step 3: Build the email body in the editor. Portal starts you off with a working
default: a heading, a short explanation, a sign-in button, and a fallback link.
Step 3: Build the email body in the editor. Portal starts you off with a working
default: a heading, a short explanation, a sign-in button, and a fallback link.
 ### The magic link variable
Whatever else you change, the template has to contain the magic link. The sign-in
URL is injected at send time through the `MAGIC_LINK` variable, written with
**three** braces on each side:
```html theme={null}
Sign in
```
It has to be the `href` of a link. Portal checks for exactly that before saving,
and blocks the save with a **Sign in button not configured** warning if it cannot
find it. A template without it would send users an email they cannot sign in from,
so there is no way to save around the check.
Putting `{{{MAGIC_LINK}}}` in the body as visible text does not satisfy the
check, and neither does two braces or a button whose `href` points anywhere else.
It has to appear as `href="{{{MAGIC_LINK}}}"` on an anchor.
Case does not matter when you type it. `{{{magic_link}}}` is normalized to
`{{{MAGIC_LINK}}}` when you save, and the check runs after that normalization, so
lowercase placeholders pass.
### The visual editor
New templates open in the visual editor, prefilled with a working design: a
heading, a short explanation, a sign-in button already wired to `{{{MAGIC_LINK}}}`,
a fallback link with the raw URL for clients where the button does not render, and
a closing line telling the recipient to ignore the email if they did not request
it.
You can edit text, adjust alignment and colours, insert images, and restyle the
sign-in button. The button and the fallback link are variable-aware, so they keep
pointing at the magic link as you restyle them and you do not need to touch the
placeholder by hand.
If you only need to change the wording and branding, stay here. Portal preserves
the editor's state with the template, so reopening it later gives you the same
document back rather than a re-imported approximation.
### The HTML editor
For full control over the markup, switch the template to HTML editing. The code
view is a split screen: an editable, syntax-highlighted HTML editor on the left,
and a live preview of that HTML on the right, updating as you type. The preview is
sandboxed, so scripts in the markup do not run.
Use it when the visual editor cannot express what you need, for example bringing
across an existing email design, hand-tuning table layouts for a specific mail
client, or adding media queries.
Switching to HTML editing is a one-way change. Portal asks you to confirm, and
once you edit the raw HTML the template can no longer be edited in the visual
editor. Your current design is carried over as HTML, and the template reopens
locked to the code view from then on.
When you save from the code view, the `{{{MAGIC_LINK}}}` requirement is enforced here
exactly as it is in the visual editor, which is the failure worth watching for.
It is easy to restructure the markup by hand and lose the `href` in the process,
and the warning modal is explicit that the button needs an `href` of `{{{MAGIC_LINK}}}`.
The template name cannot be changed after the template is created. The subject and
body can be edited at any time, and edits go live for new sends as soon as you
save.
### Copy the template ID
Your app passes the template's ID when it requests a magic link. Copy it from the
ID column in the Templates list. Store it in your app's configuration alongside
your from email.
This is the Portal template ID shown in the dashboard. It is not the ID used by
Portal's underlying email delivery provider, and the two are not
interchangeable.
## Step 4: Send a magic link
With a `verified` domain and a template, your app can send. All four fields are
required.
```bash theme={null}
curl --request POST \
--url https://api.portalhq.io/api/v3/auth/magic-links \
--header 'x-portal-auth-environment-id: ' \
--header 'Content-Type: application/json' \
--data '{
"email": "user@example.com",
"redirectUrl": "https://example.com/callback",
"fromEmail": "hello@auth.example.com",
"templateId": ""
}'
```
```json theme={null}
{
"data": { "sent": true },
"metadata": null
}
```
| Field | Requirement |
| ------------- | ---------------------------------------------------------------------- |
| `email` | The user's email address. Must be lowercase. |
| `redirectUrl` | Must exactly match one of the environment's Redirect URLs. |
| `fromEmail` | Must belong to a verified domain that is enabled for this environment. |
| `templateId` | Must be one of your Portal templates. |
`sent: true` confirms Portal accepted the request and handed the email off for
delivery. It does not confirm the message reached the inbox.
Magic link sends are rate limited per environment and email address. If your app
lets users request a new link, expect a `429` when someone taps the button
repeatedly, and show them a "check your inbox or try again shortly" message
rather than an error.
## Step 5: Exchange the token
The user receives the email and clicks through to your Redirect URL, which Portal
appends a token to:
```
https://example.com/callback?token=&authMethod=EMAIL_MAGIC_LINK
```
Read `token` from the query string and post it back:
```bash theme={null}
curl --request POST \
--url https://api.portalhq.io/api/v3/auth/magic-links/validations \
--header 'x-portal-auth-environment-id: ' \
--header 'Content-Type: application/json' \
--data '{ "token": "" }'
```
```json theme={null}
{
"data": {
"endUserId": "clx1enduser00000000000000",
"clientSessionToken": "b7c1f0a2-3d4e-5f60-8a91-2b3c4d5e6f70",
"userJwt": null,
"totpLink": null
},
"metadata": null
}
```
If the environment requires a second factor, `clientSessionToken` is `null` and
`userJwt` is set instead. See
[Two-factor authentication](/resources/authentication/two-factor-authentication).
The token is single-use. Some email clients and security scanners pre-fetch links
in messages, which can consume a token before the user clicks it. Exchange the
token from the page the user lands on rather than from anything that runs when
the link is merely fetched, and handle a `401` by offering to send a new link.
## Next steps
Add a TOTP second factor to every sign-in.
Full reference for the magic link endpoints.
### The magic link variable
Whatever else you change, the template has to contain the magic link. The sign-in
URL is injected at send time through the `MAGIC_LINK` variable, written with
**three** braces on each side:
```html theme={null}
Sign in
```
It has to be the `href` of a link. Portal checks for exactly that before saving,
and blocks the save with a **Sign in button not configured** warning if it cannot
find it. A template without it would send users an email they cannot sign in from,
so there is no way to save around the check.
Putting `{{{MAGIC_LINK}}}` in the body as visible text does not satisfy the
check, and neither does two braces or a button whose `href` points anywhere else.
It has to appear as `href="{{{MAGIC_LINK}}}"` on an anchor.
Case does not matter when you type it. `{{{magic_link}}}` is normalized to
`{{{MAGIC_LINK}}}` when you save, and the check runs after that normalization, so
lowercase placeholders pass.
### The visual editor
New templates open in the visual editor, prefilled with a working design: a
heading, a short explanation, a sign-in button already wired to `{{{MAGIC_LINK}}}`,
a fallback link with the raw URL for clients where the button does not render, and
a closing line telling the recipient to ignore the email if they did not request
it.
You can edit text, adjust alignment and colours, insert images, and restyle the
sign-in button. The button and the fallback link are variable-aware, so they keep
pointing at the magic link as you restyle them and you do not need to touch the
placeholder by hand.
If you only need to change the wording and branding, stay here. Portal preserves
the editor's state with the template, so reopening it later gives you the same
document back rather than a re-imported approximation.
### The HTML editor
For full control over the markup, switch the template to HTML editing. The code
view is a split screen: an editable, syntax-highlighted HTML editor on the left,
and a live preview of that HTML on the right, updating as you type. The preview is
sandboxed, so scripts in the markup do not run.
Use it when the visual editor cannot express what you need, for example bringing
across an existing email design, hand-tuning table layouts for a specific mail
client, or adding media queries.
Switching to HTML editing is a one-way change. Portal asks you to confirm, and
once you edit the raw HTML the template can no longer be edited in the visual
editor. Your current design is carried over as HTML, and the template reopens
locked to the code view from then on.
When you save from the code view, the `{{{MAGIC_LINK}}}` requirement is enforced here
exactly as it is in the visual editor, which is the failure worth watching for.
It is easy to restructure the markup by hand and lose the `href` in the process,
and the warning modal is explicit that the button needs an `href` of `{{{MAGIC_LINK}}}`.
The template name cannot be changed after the template is created. The subject and
body can be edited at any time, and edits go live for new sends as soon as you
save.
### Copy the template ID
Your app passes the template's ID when it requests a magic link. Copy it from the
ID column in the Templates list. Store it in your app's configuration alongside
your from email.
This is the Portal template ID shown in the dashboard. It is not the ID used by
Portal's underlying email delivery provider, and the two are not
interchangeable.
## Step 4: Send a magic link
With a `verified` domain and a template, your app can send. All four fields are
required.
```bash theme={null}
curl --request POST \
--url https://api.portalhq.io/api/v3/auth/magic-links \
--header 'x-portal-auth-environment-id: ' \
--header 'Content-Type: application/json' \
--data '{
"email": "user@example.com",
"redirectUrl": "https://example.com/callback",
"fromEmail": "hello@auth.example.com",
"templateId": ""
}'
```
```json theme={null}
{
"data": { "sent": true },
"metadata": null
}
```
| Field | Requirement |
| ------------- | ---------------------------------------------------------------------- |
| `email` | The user's email address. Must be lowercase. |
| `redirectUrl` | Must exactly match one of the environment's Redirect URLs. |
| `fromEmail` | Must belong to a verified domain that is enabled for this environment. |
| `templateId` | Must be one of your Portal templates. |
`sent: true` confirms Portal accepted the request and handed the email off for
delivery. It does not confirm the message reached the inbox.
Magic link sends are rate limited per environment and email address. If your app
lets users request a new link, expect a `429` when someone taps the button
repeatedly, and show them a "check your inbox or try again shortly" message
rather than an error.
## Step 5: Exchange the token
The user receives the email and clicks through to your Redirect URL, which Portal
appends a token to:
```
https://example.com/callback?token=&authMethod=EMAIL_MAGIC_LINK
```
Read `token` from the query string and post it back:
```bash theme={null}
curl --request POST \
--url https://api.portalhq.io/api/v3/auth/magic-links/validations \
--header 'x-portal-auth-environment-id: ' \
--header 'Content-Type: application/json' \
--data '{ "token": "" }'
```
```json theme={null}
{
"data": {
"endUserId": "clx1enduser00000000000000",
"clientSessionToken": "b7c1f0a2-3d4e-5f60-8a91-2b3c4d5e6f70",
"userJwt": null,
"totpLink": null
},
"metadata": null
}
```
If the environment requires a second factor, `clientSessionToken` is `null` and
`userJwt` is set instead. See
[Two-factor authentication](/resources/authentication/two-factor-authentication).
The token is single-use. Some email clients and security scanners pre-fetch links
in messages, which can consume a token before the user clicks it. Exchange the
token from the page the user lands on rather than from anything that runs when
the link is merely fetched, and handle a `401` by offering to send a new link.
## Next steps
Add a TOTP second factor to every sign-in.
Full reference for the magic link endpoints.