Overview
Single Sign-On (SSO) allows organizations to manage authentication and authorization of their members for external applications, such as Portal’s Admin Dashboard, using an identity provider (IdP) like Okta, Azure AD, or Google Workspace. With SSO enabled, your organization’s members can access the Portal Admin Dashboard using their existing corporate credentials, eliminating the need for separate Portal accounts. This provides a seamless authentication experience while maintaining centralized control over access.If you don’t see the Single Sign-On section in your Settings page, reach out
to Portal’s support team via
Slack
to enable SSO for your workspace.
- OIDC (OpenID Connect): A modern authentication protocol built on OAuth 2.0
- SAML2 (Security Assertion Markup Language 2.0): An XML-based protocol for exchanging authentication and authorization data
How SSO Works
Once SSO is configured for your organization, the authentication flow works as follows:- Member Access: When a member attempts to access the Admin Dashboard, they are prompted to provide a unique slug associated with your organization’s SSO configuration.
- IdP Redirect: After entering the slug, the member is redirected to your organization’s identity provider (IdP) for authentication.
- Authentication: The member authenticates using their corporate credentials through the IdP.
- Dashboard Access: Upon successful authentication at the IdP, the member is redirected back to the Portal Admin Dashboard and granted access.
Configuration Steps
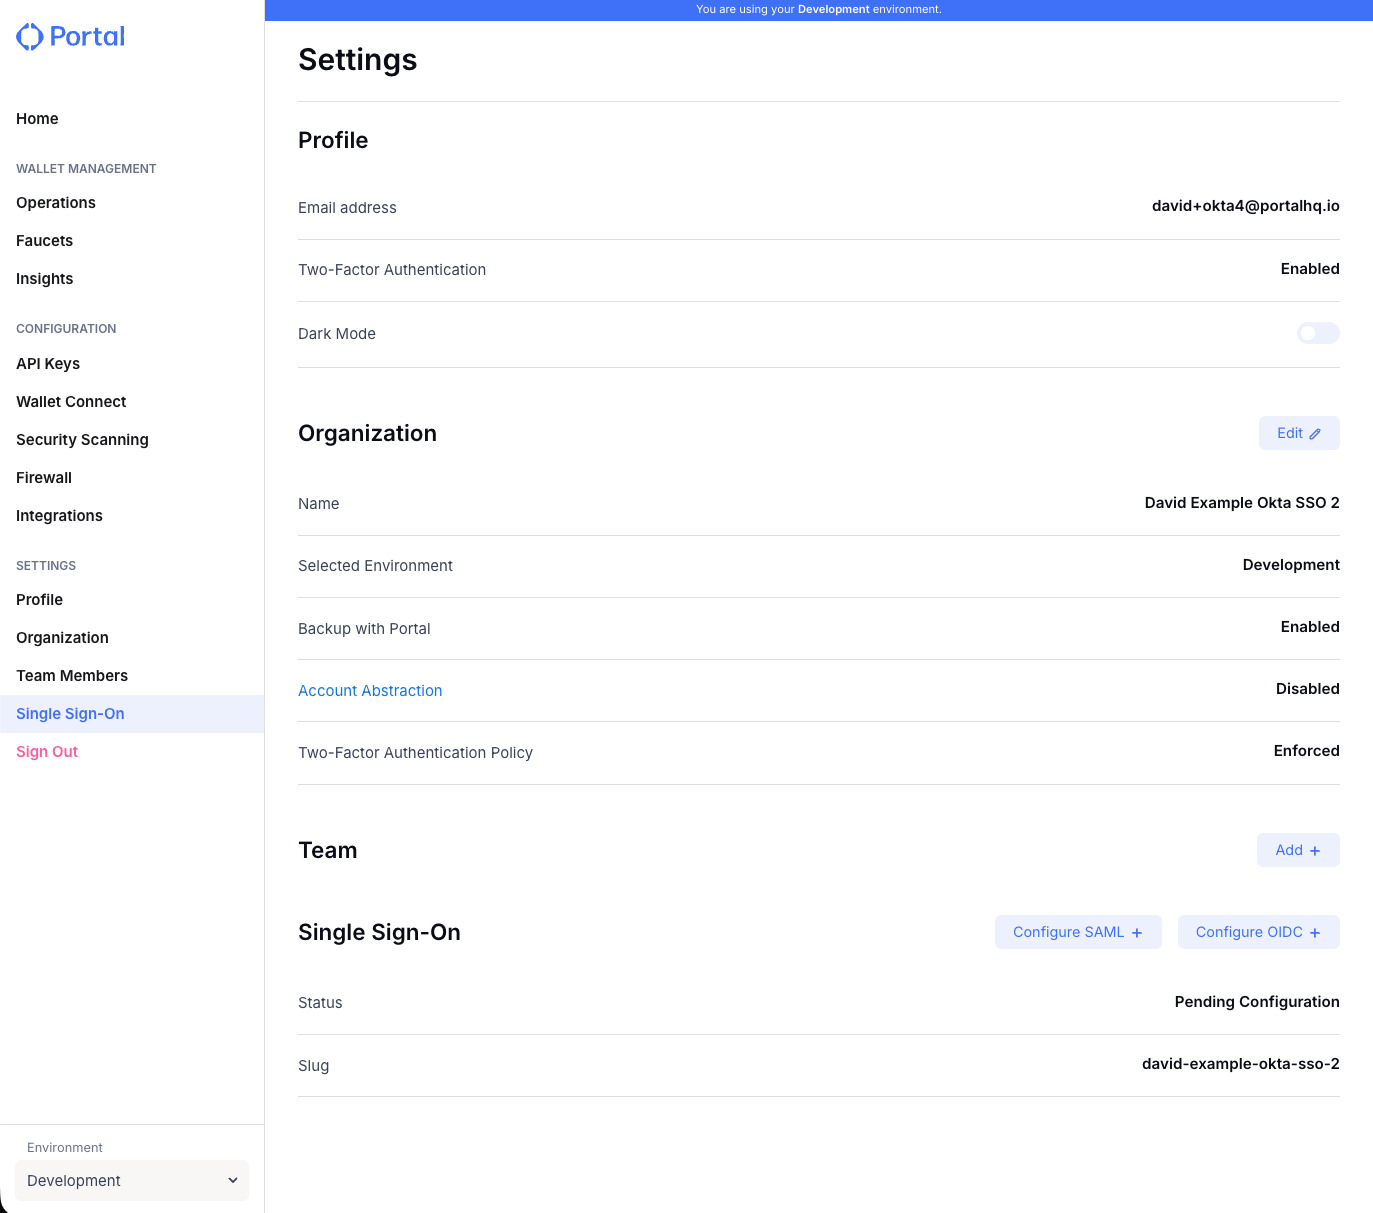
To begin configuring SSO, first access the Single Sign-On section:- Log into your Portal Admin Dashboard.
- Navigate to the Settings page.
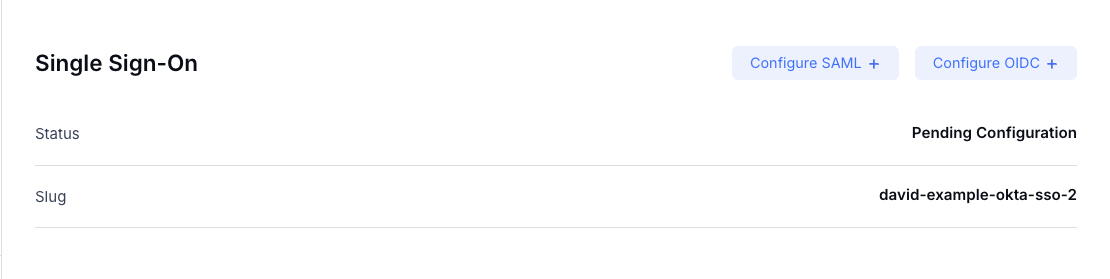
- Locate the “Single Sign-On” section.
OIDC Configuration Steps
To set up OIDC Single Sign-On:- In the Single Sign-On section, click Configure OIDC.
- A modal titled “Configure OIDC Single Sign-On Connection” will appear.
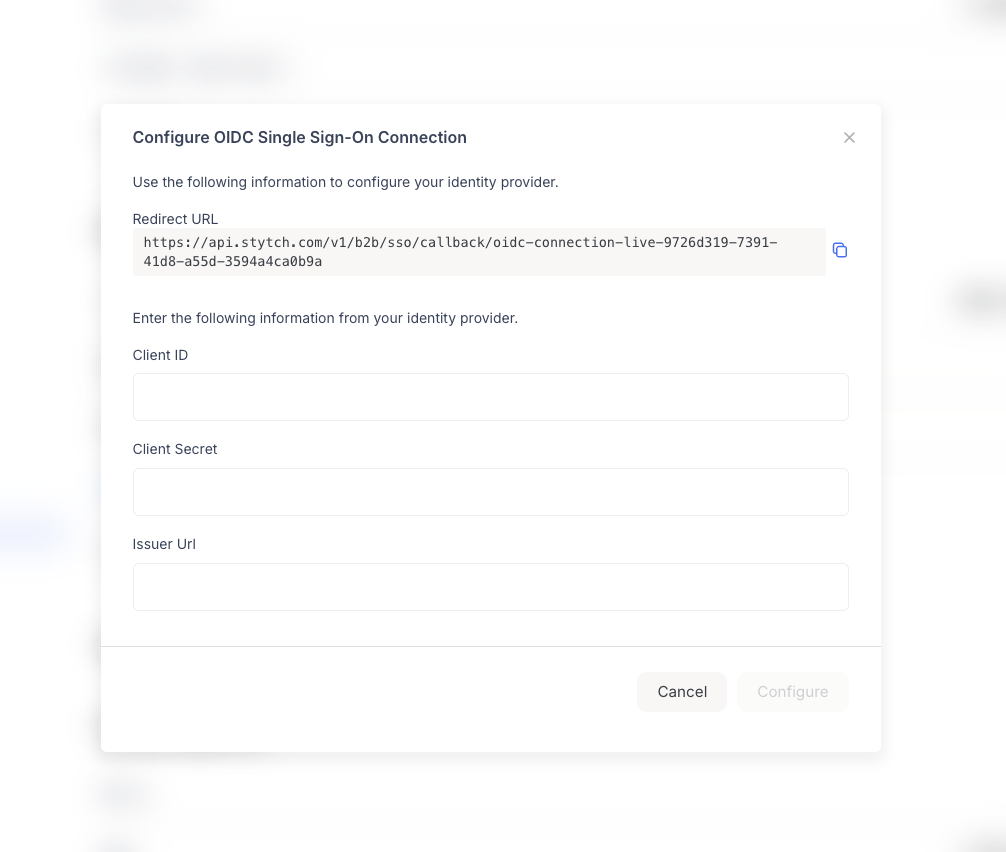
- Redirect URL: The callback URL that your IdP will use to redirect users back to Portal after authentication.
- Client ID: The OAuth client identifier from your IdP
- Client Secret: The OAuth client secret from your IdP
- Issuer URL: The OIDC issuer URL from your IdP (typically in the format
https://your-idp-domain.com)
Configure Your Identity Provider
- Log into your identity provider’s admin console.
- Create a new OIDC Application and choose Web Application for Application Type.
-
Configure the following in your IdP:
- Redirect URI / Callback URL: Paste the Redirect URL you copied from Portal
- Note the Client ID and Client Secret that your IdP generates
- Note your IdP’s Issuer URL
-
From your IdP, copy the following:
- Client ID: The OAuth client identifier from your IdP
- Client Secret: The OAuth client secret from your IdP
- Issuer URL: The OIDC issuer URL from your IdP
- Return to the Portal modal and enter the Client ID, Client Secret, and Issuer URL.
- Click “Configure” to save your OIDC SSO settings.
SAML2 Configuration Steps
To set up SAML2 Single Sign-On:- In the Single Sign-On section, click Configure SAML2.
- A modal titled “Configure SAML Single Sign-On Connection” will appear.
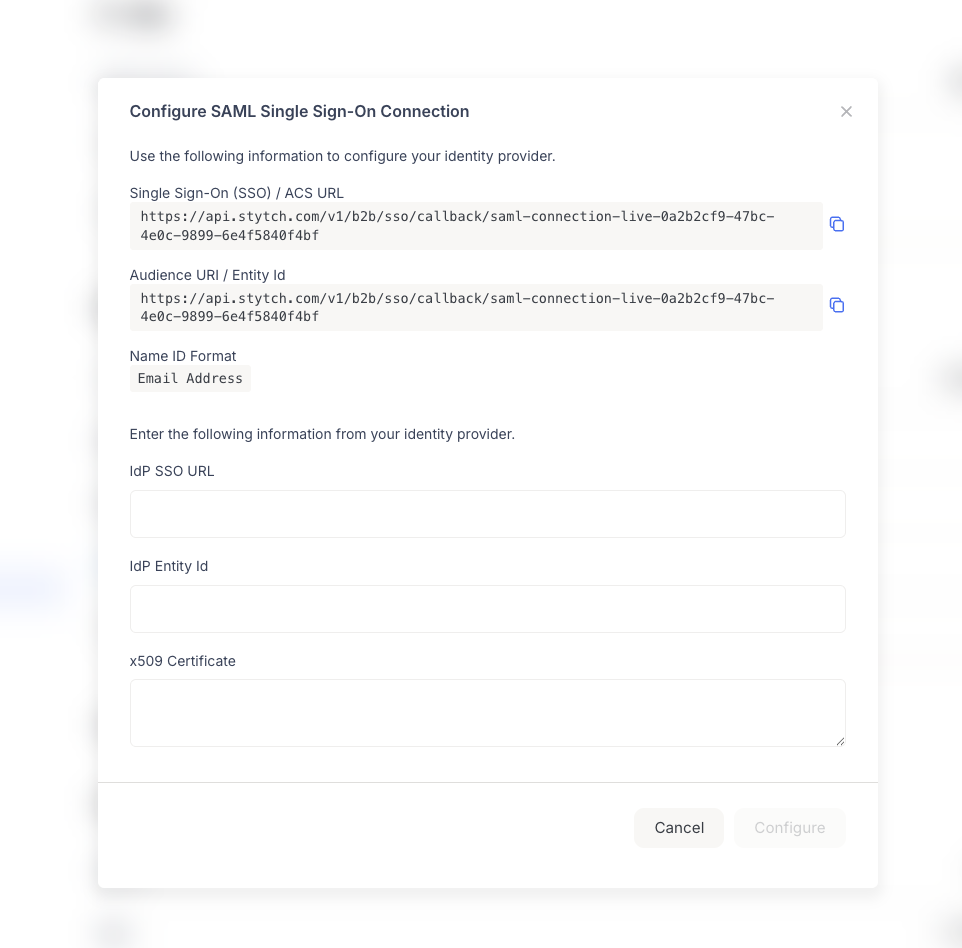
- Single Sign-On (SSO) / ACS URL: The Assertion Consumer Service URL where your IdP should send SAML responses.
- Audience URI / Entity Id: The Entity ID that identifies Portal as the Service Provider. This is typically the same URL as the ACS URL.
- Name ID Format: The format for the user identifier. Portal uses “Email Address” as the Name ID format.
- IdP SSO URL: The Single Sign-On URL from your IdP where users will be redirected for authentication
- IdP Entity Id: The Entity ID that identifies your identity provider
- x509 Certificate: The X.509 certificate from your IdP used to verify SAML assertions
Configure Your Identity Provider
- Log into your identity provider’s admin console.
- Create a new SAML Application.
-
Configure the following in your IdP:
- Single sign-on URL / ACS URL: Paste the SSO / ACS URL you copied from Portal
- Audience URI / SP Entity ID: Paste the Audience URI / Entity Id you copied from Portal
- Name ID format: Set to “Email Address” (or “Unspecified” if your IdP supports it and will send email addresses)
- Recipient URL and Destination URL: Typically the same as the Single sign-on URL (some IdPs have a checkbox to use the same value)
-
From your IdP, copy the following:
- IdP SSO URL: The Single Sign-On URL from your IdP
- IdP Entity Id: The Entity ID from your IdP
- x509 Certificate: The X.509 certificate (usually found in the SAML settings or metadata)
- Return to the Portal modal and enter the IdP SSO URL, IdP Entity Id, and x509 Certificate.
- Click “Configure” to save your SAML2 SSO settings.
The x509 Certificate should be copied in its entirety, including the
-----BEGIN CERTIFICATE----- and -----END CERTIFICATE----- lines if they
are present in your IdP’s certificate display.Understanding Your SSO Configuration
After configuring SSO, the Single Sign-On section will display:- Status: Shows whether SSO is Enabled or Disabled
- Slug: A unique identifier for your SSO connection (e.g.,
david-example-okta-sso). This is the slug that members will use to access the dashboard via SSO. - Reconfigure Button: Allows you to update your SSO configuration at any time
The slug is automatically generated based on your configuration. Members will
need to know this slug to access the dashboard via SSO.
Common Identity Provider Setup Examples
Okta
For OIDC with Okta:- In Okta Admin Console, go to Applications > Applications > Create App Integration.
- Select OIDC - OpenID Connect as the sign-in method.
- Choose Web Application as the application type.
- Configure:
- Sign-in redirect URIs: Add the Redirect URL from Portal
- Sign-out redirect URIs: (Optional) Add a sign-out URL if needed
- After creating the app, note the Client ID and Client Secret.
- The Issuer URL is typically:
https://your-domain.okta.comorhttps://your-domain.okta.com/oauth2/default
- In Okta Admin Console, go to Applications > Applications > Create App Integration.
- Select SAML 2.0 as the sign-in method.
- In the “2 Configure SAML” step, configure the following:
- Single sign-on URL: Paste the SSO / ACS URL from Portal
- Check the box “Use this for Recipient URL and Destination URL” (if available)
- Audience URI (SP Entity ID): Paste the Audience URI / Entity Id from Portal
- Name ID format: Select “Unspecified” (Okta will send email addresses when configured)
- Application username: Typically set to “Okta username” or “Email”
- After saving, go to the “Sign On” tab to find:
- IdP SSO URL: Copy the “Identity Provider Single Sign-On URL”
- IdP Entity Id: Copy the “Identity Provider Issuer” (Entity ID)
- x509 Certificate: Copy the certificate from the “X.509 Certificate” section
- Enter these values in the Portal SAML configuration modal.
Azure AD (Microsoft Entra ID)
For OIDC with Azure AD:- In Azure Portal, go to Azure Active Directory > App registrations > New registration.
- Configure:
- Redirect URI: Add the Redirect URL from Portal (select “Web” platform)
- After registration, note the Application (client) ID.
- Go to Certificates & secrets to create a new client secret.
- The Issuer URL format is:
https://login.microsoftonline.com/{tenant-id}/v2.0
- In Azure Portal, go to Enterprise applications > New application.
- Choose Non-gallery application or integrate a SAML application.
- Configure the SAML settings with the ACS URL and Entity ID provided by Portal.
Google Workspace
For OIDC with Google Workspace:- Go to Google Cloud Console.
- Navigate to APIs & Services > Credentials > Create Credentials > OAuth client ID.
- Configure:
- Application type: Web application
- Authorized redirect URIs: Add the Redirect URL from Portal
- Note the Client ID and Client Secret.
- The Issuer URL is:
https://accounts.google.com
Troubleshooting
Common Issues
Issue: Redirect URL mismatch- Solution: Ensure the Redirect URL in your IdP exactly matches the one provided by Portal. Check for trailing slashes, HTTP vs HTTPS, and any extra characters.
- Solution: Verify that you’ve copied the Client ID and Client Secret correctly from your IdP. Some IdPs require you to view the secret immediately after creation.
- Solution: Confirm the Issuer URL format with your IdP documentation. Some IdPs use different issuer URLs for different environments (e.g., sandbox vs. production).
- Solution:
- Verify that SSO status shows as “Enabled”
- Confirm members are using the correct slug
- Check that the IdP configuration is complete and active
- Ensure members have the necessary permissions in your IdP
- Solution:
- Verify the X.509 certificate is valid and not expired
- Ensure the Entity ID matches between Portal and your IdP
- Check that the ACS URL is correctly configured in your IdP
- Review SAML response logs in your IdP for specific error messages
If you encounter issues not covered here, reach out to Portal’s support team
via
Slack
for assistance.