

Step 1: Create the OAuth client in Google Cloud Console
- Open the Google Cloud Console and select or create a project.
-
Go to APIs & Services > OAuth consent screen and configure it if you have
not already. Portal requests the
openid,email, andprofilescopes, all of which are non-sensitive, so this does not require Google verification for internal or standard use. -
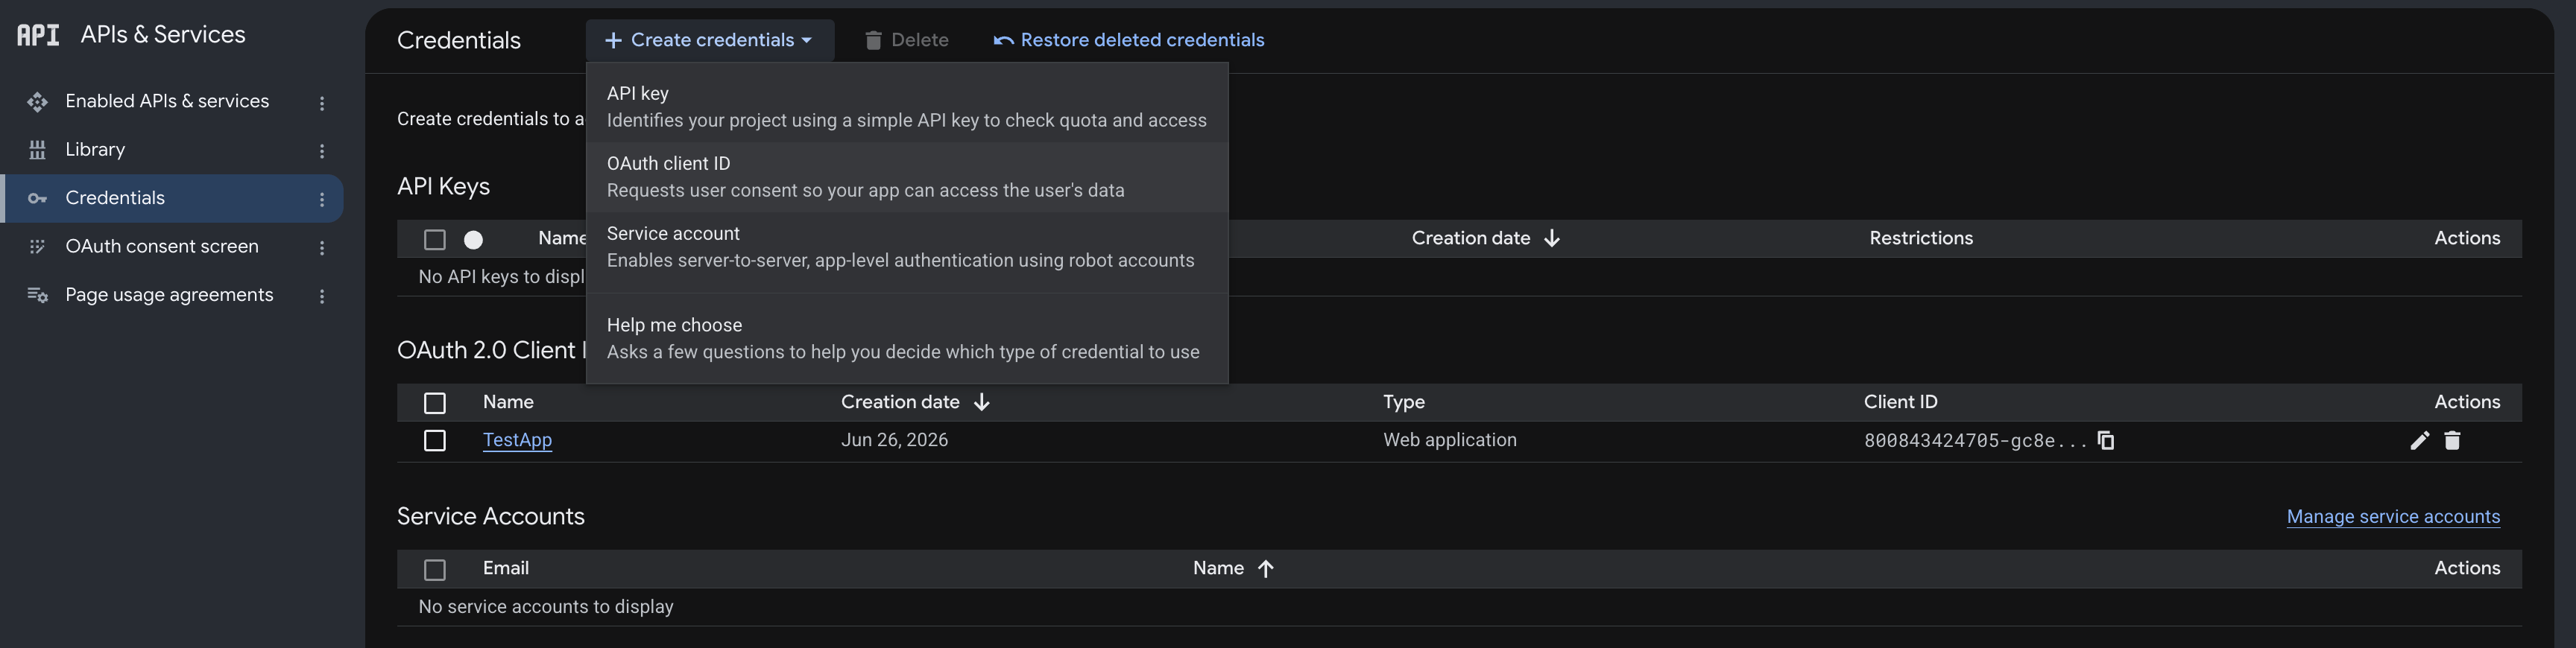
Go to APIs & Services > Credentials and click
Create Credentials > OAuth client ID.
- For Application type, choose Web application.
-
Give it a name you will recognize, for example
Portal Authentication.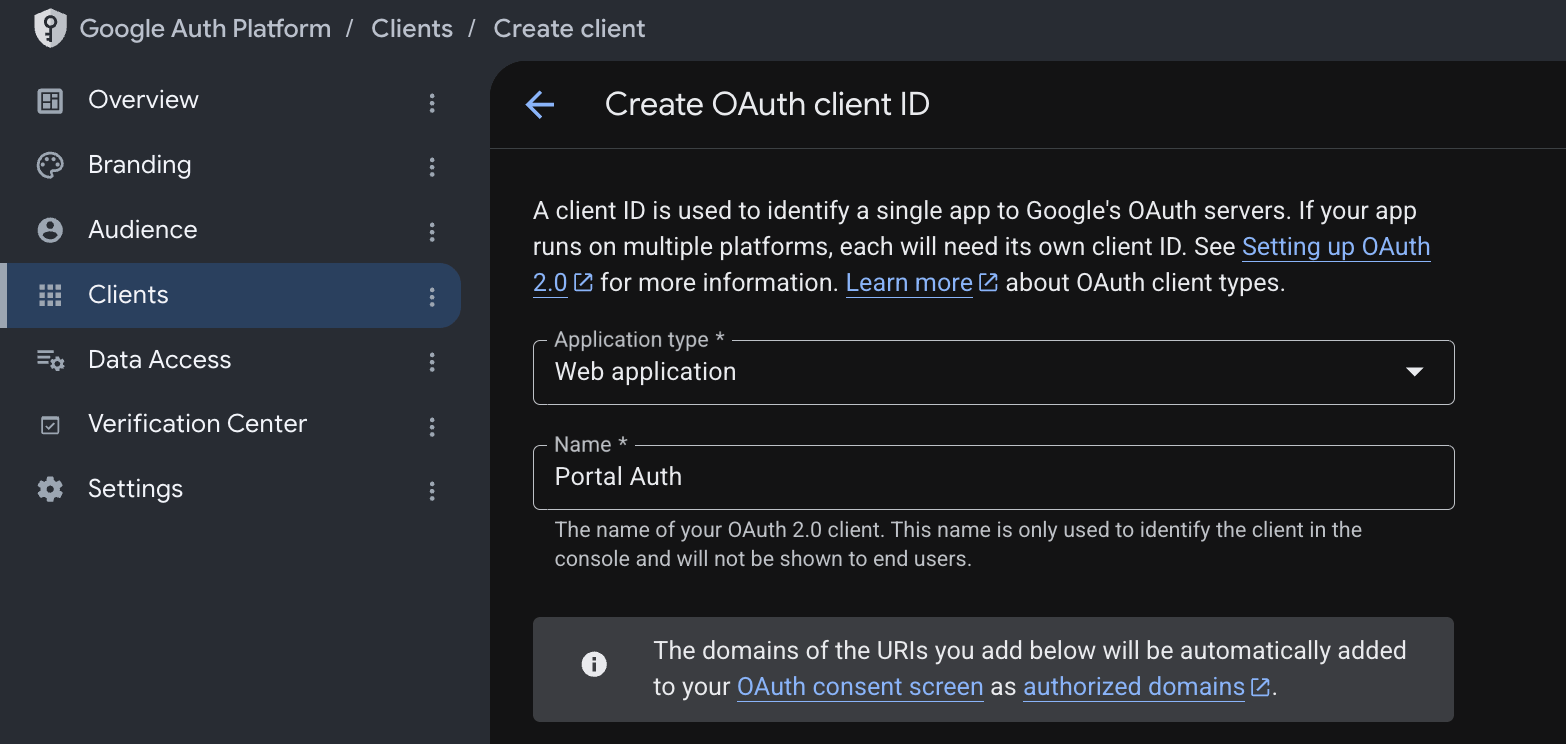
-
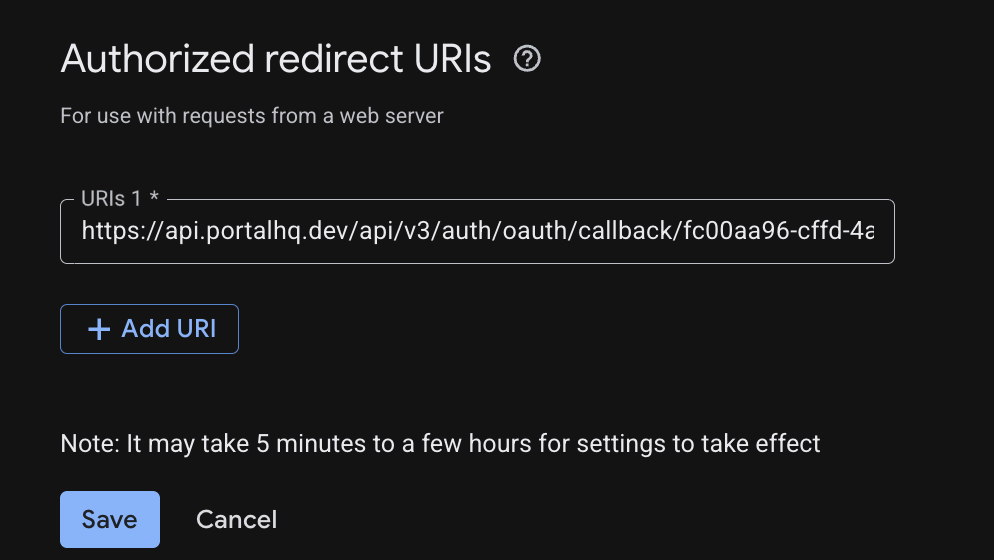
Under Authorized redirect URIs, click Add URI and add the Portal
callback URL for each of your environments:
- Click Create, then copy the Client ID and Client secret.
You do not need to add anything under Authorized JavaScript origins. The
OAuth exchange happens server to server between Portal and Google, not in your
user’s browser.
The redirect URI Google needs
The Google OAuth process should redirect to Portal, which verifies the sign-in with Google and then redirects the user on to your Redirect URL. The URI you register with Google is therefore a Portal URL:<AUTH_ENVIRONMENT_ID> with the Auth Environment ID from
Authentication > Configure. Because each environment has a different Auth
Environment ID, each environment needs its own entry in Google’s authorized
redirect URIs. If you use Development and Production, register both.
Step 2: Enter the credentials in Portal
Information from Google (to enter in Portal):- Client ID: the OAuth client identifier, ending in
.apps.googleusercontent.com - Client secret: the OAuth client secret
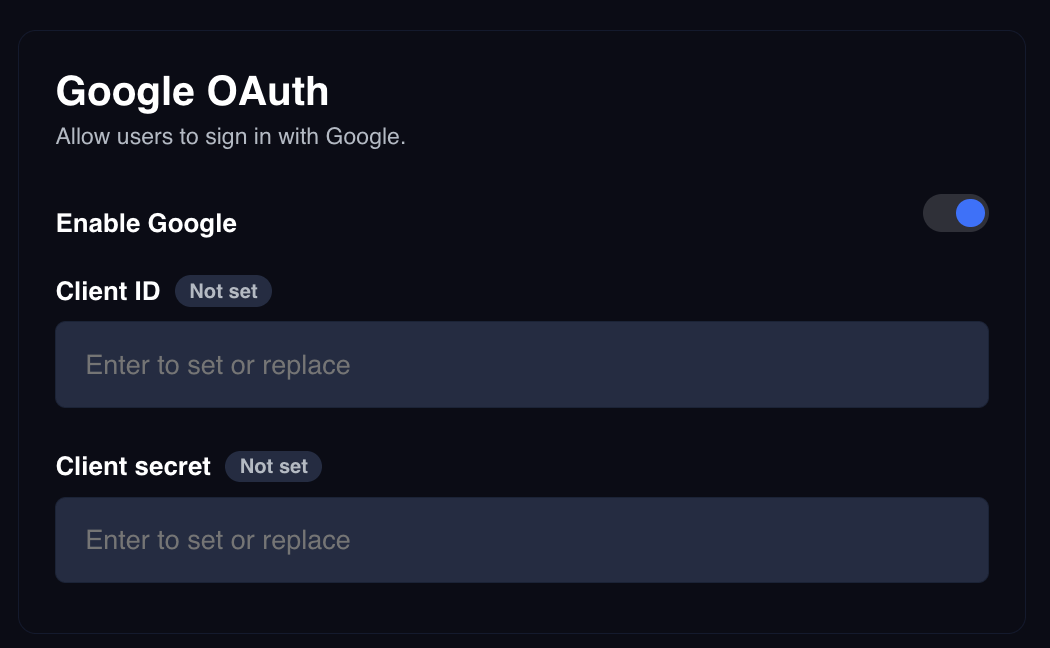
If you use the same Google OAuth client for Development and Production, enter the
same Client ID and secret in both environments. The credentials are stored per
environment.
Step 3: Sign a user in
Get the authorize URL
google key only if Google is enabled on the
environment. redirectUrl must be URL-encoded in the query string and must
exactly match one of your Redirect URLs.
To create the user’s client with gas sponsorship, add isAccountAbstracted to the
query string:
true or false. Omit it to
use your organization’s default. See
Gas sponsorship.
Send the user to Google
Opendata.google in a browser. The user picks their Google account and consents.
Google returns them to Portal, Portal verifies the sign-in, and Portal redirects
them to your Redirect URL:
Magic links use an
authMethod query parameter and OAuth uses login_type. If
you support both, read whichever is present rather than assuming one name.Exchange the token
clientId and isAccountAbstracted describe the client Portal created or reused
for this user.
If the environment requires a second factor, userJwt is set instead and
clientId, clientSessionToken, and isAccountAbstracted are all null. They
arrive with the TOTP validation response once the user enters their code. See
Two-factor authentication.
Handle a failed sign-in
If the user cancels, or anything in the exchange fails, Portal still redirects them to your Redirect URL, with an error instead of a token:Google Drive backups are separate
If you also use Google Drive as a wallet backup method, that is an independent authorization with its own scopes, requested by the SDK when the user backs up. Signing in with Google here does not grant Drive access, and it does not replace the setup described in the Google Drive backup guides.Next steps
Apple OAuth
Add Sign in with Apple alongside Google.
API reference
Full reference for the OAuth endpoints.